
Understanding the Rule of Thirds
What is the Rule of Thirds?
The rule of thirds is probably the most well-known and well used composition technique in photography. Used by professionals and newcomers alike, the rule of thirds helps photographers to compose an image in such a way that the viewer can interact with it more naturally. Used effectively, the rule of thirds will help to guide your viewer’s eye into and through the image. Helping your viewer to ‘journey’ through the photograph without the distractions of unwanted ‘clutter’ will improve the viewers overall experience of your work and improve your photography greatly. Additionally, the rule of thirds will also help to provide your photo with a sense of depth and balance - an essential part of landscape photography.
So how does it work?
The rule of thirds is a process by which you imagine dividing your frame (the image you see through your viewfinder) into nine equal rectangles. You can do this by imagining two vertical and two horizontal lines. (Note: - it’s worth checking the settings within your camera as some models will allow you to superimpose a rule of thirds grid over your viewfinder!). You’ll then notice that the four lines will intersect at four points. The rule of thirds suggests that these are the points where your subject (or point of interest) should be placed for maximum impact (see Figure 1).

Figure 1: The rule of thirds. The four red circles show where the lines intersect and where your point of interest should lay.
How to use the rule of thirds
To use the rule of thirds, find a point of interest and looking through your viewfinder, place the object (or subject) at one of the four ‘imagined’ intersecting points (marked by a red circle in Figure 1) - top left or right, bottom left or right. By placing the objects (or subjects) here, you’ll find that the image has more overall ‘balance’. It’s a better visual effect than placing the object in the middle.
Let’s look at some examples:
Example 1 - In the two examples below of ‘The Alex Boathouse in winter’, the image on the left has been composed so that the boathouse sits on the lower right hand intersection of lines. This is an ideal place for your subject. Had this photograph been taken with the boathouse directly in the middle of the image, it would have left the photograph appearing ‘flat’ - lacking in depth and balance.

The Alex Boathouse in winter, Talkin Tarn, Brampton, Cumbria.
Example 2 - In this black and white image, you can see that the tree is placed in the upper left hand third of the frame. Overlaying the rule of thirds grid confirms that the tree has been placed at the upper left hand intersection point. Note: the rule of thirds is always to be considered as a ‘guide’ - something to aid the photographer’s composition. It is not a rule to be strictly adhered to or limited by. One of the joys of photography is that the photograph is always produced as a result of the photographer’s interpretation of a scene - it is subjective. Therefore, feel free in exercising your creativity, use the grid ‘loosely’ and if you feel your subject is best placed away from an intersecting point - do it! It’s always great to experiment! The grid is a ‘guide’.
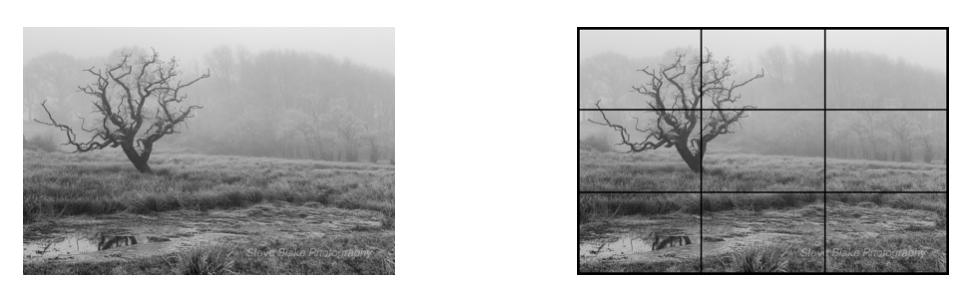
Lone tree - Finglandrigg
Written and produced by www.steveblakephotography.co.uk